

⚡ Claim Your FusionClubTV Free Trial
No credit card required • Instant activation
DNS servers have a big effect on IPTV streaming. There aren't any required steps to speed up the internet, but there are a lot of small changes and improvements that can be made. All of these improvements work together to speed up the internet, with DNS servers playing a starring role.
Before switching to a different DNS address, you should write down your current DNS address to make sure you keep these numerical values in case you need to go back to the original settings. If the initial configuration was set to "Automatic," all you have to do is change your DNS settings back to "Automatic." The above instruction is valid for all of the devices mentioned in this discourse.
 Step 2: You'll see three buttons after a short time. Click on "IP Settings" and move on to the next step.
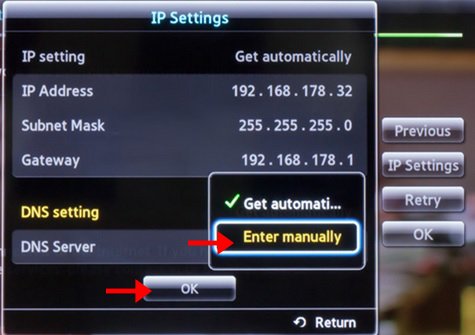
 Step 3: Pick "DNS setting." Press "Enter manually."
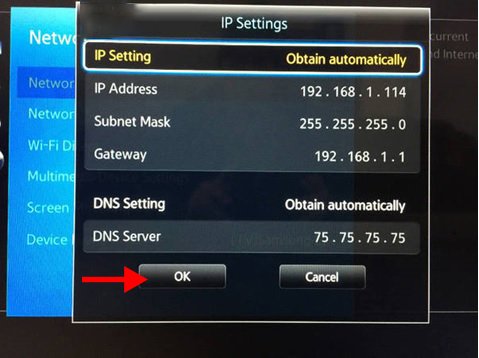
 Type in the DNS address shown below, then click "Ok."
DNS addresses:
Type in the DNS address shown below, then click "Ok."
DNS addresses:
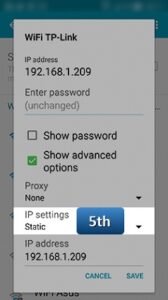
 Click on "IP settings" in the second step.
Pick "Static" from the menu.
Next, enter a valid IP address that isn't being used by any other devices on the same local network, or leave it as shown in the second picture below.
Enter 24 in Step 6 and skip.
Step 7: This is the most important step for us.
Type in one of the DNS addresses below and click "Save."
Addresses in DNS:
Click on "IP settings" in the second step.
Pick "Static" from the menu.
Next, enter a valid IP address that isn't being used by any other devices on the same local network, or leave it as shown in the second picture below.
Enter 24 in Step 6 and skip.
Step 7: This is the most important step for us.
Type in one of the DNS addresses below and click "Save."
Addresses in DNS:
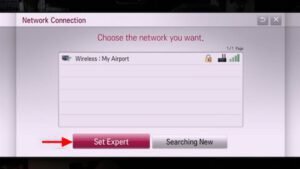
 Step 2: Find the "Network" submenu, click on "Network Connection," and then press "Set Expert."
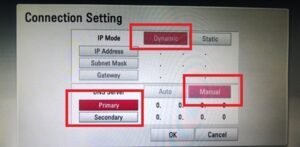
 Option 3: Press "Dynamic" under "IP Mode." Pick "Manual" for "DNS Server."
 Type in the DNS address shown below, then click "Ok."
Addresses in DNS:
Type in the DNS address shown below, then click "Ok."
Addresses in DNS:
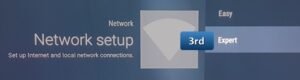
 Step 2: Select “Network Setup”.
 Step 3: Choose “Expert”.
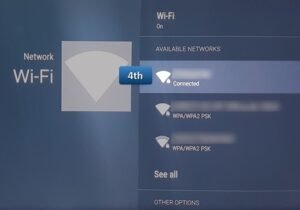
 Step 4: Select “Wi-Fi” or “Wired LAN” based on your connection.
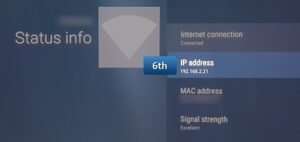
 Step 5: Select “Status Info”.
 Step 6: Record your "IP address".
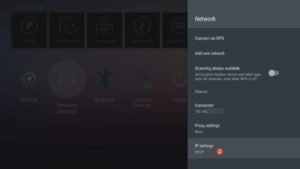
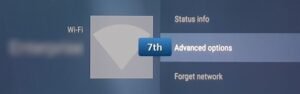
 Step 7: Select “Advanced options” from network.
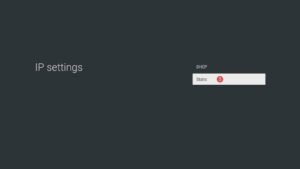
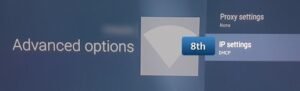
 Step 8: Select “IP settings”.
 Step 9: Select “Static”.
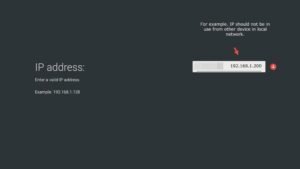
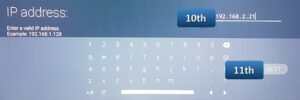
 Step 10: Enter the first three IP address data groups. Enter “192.166.1” if your IP address is “192.166.1.1“. For the fourth group of numbers, enter “50” to create the final IP address, such as “192.166.1.50“, then click “Next“.
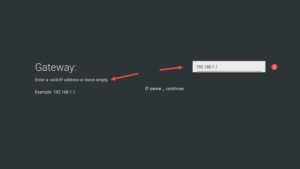
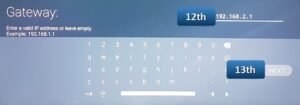
 Step 11: Enter the router's IP address as the "Gateway" and click "Next".
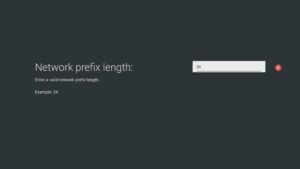
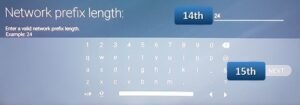
 Step 12: Type “24” for “Network Prefix Length” and click “Next”.
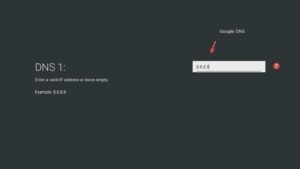
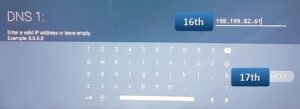
 Step 13: Select your preferred DNS and click “Next”.
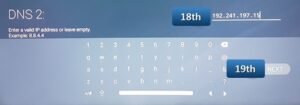
 Step 14: Type in one of the Alt DNS addresses for DNS 2 and click "Next."
 Click "Ok" to confirm your choice.
Nameserver addresses (DNS):
Click "Ok" to confirm your choice.
Nameserver addresses (DNS):
 Step 2: Click on "Network."
 Step 3: Click on "Wi-Fi."
 Step 4: Select your Wi-Fi hotspot.
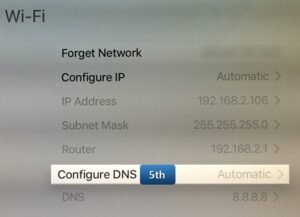
 Step 5: Scroll down and click on "Configure DNS."
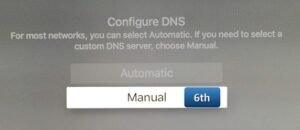
 Step 6: When you are asked to pick between Manual and Automatic, pick "Manual."
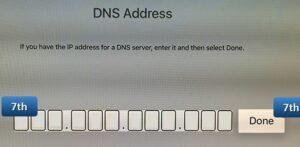
 Step 7: Please enter the address of the DNS server in the DNS field. Needful! For each group, you should enter three numbers.
For example, you should type 001.011.111.123 for DNS 1.11.111.123. Press "Done."
Step 7: Please enter the address of the DNS server in the DNS field. Needful! For each group, you should enter three numbers.
For example, you should type 001.011.111.123 for DNS 1.11.111.123. Press "Done."
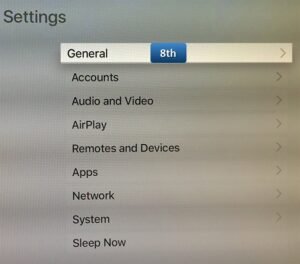
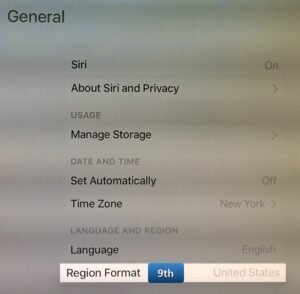
 Step 8: You have set up your Smart DNS. Pick "General" from "Settings" to do that.
 Step 9: Press the "Region Format" button when you find it.
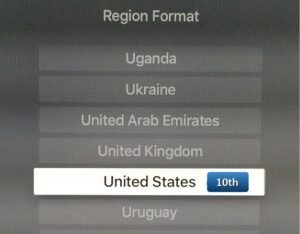
 Step 10: Pick your country from the list, like "The United States."
 Go back to the main screen and pick "Settings." Give the order "Sleep Now."
After that, take your Apple TV's power cord out and wait 10 seconds. After that, plug the power cord back into the Apple TV.
Nameserver addresses (DNS):
Go back to the main screen and pick "Settings." Give the order "Sleep Now."
After that, take your Apple TV's power cord out and wait 10 seconds. After that, plug the power cord back into the Apple TV.
Nameserver addresses (DNS):
 Step 2: Select your network.
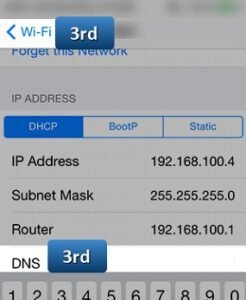
 Step 3: Enter DNS Server addresses in the DNS field.
 DNS addresses:
 Step 2: Type the address of the DNS server into the DNS field. To save your changes, tap "Wi-Fi" in the upper left corner.
 Nameserver addresses (DNS):
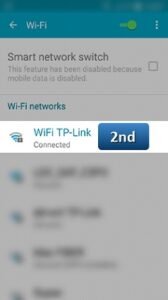
 Step 2: Select “Wi-Fi” and hold/press the active wireless network until a dialog appears.
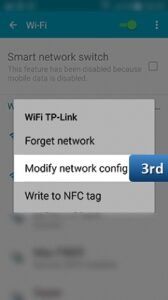
 Step 3: Select “Modify network config”.
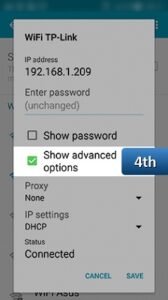
Step 4: Select “Show advanced options”.
Step 5: Set “IP settings” to “Static”.
Step 6: Enter DNS Server addresses in “DNS 1” and “DNS 2” fields, then press “Save”.
DNS addresses:
Step 3: Select “Modify network config”.
Step 4: Select “Show advanced options”.
Step 5: Set “IP settings” to “Static”.
Step 6: Enter DNS Server addresses in “DNS 1” and “DNS 2” fields, then press “Save”.
DNS addresses:
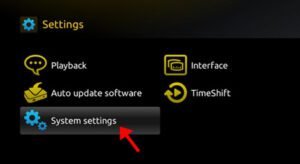
 Secondly, click on "System Settings."
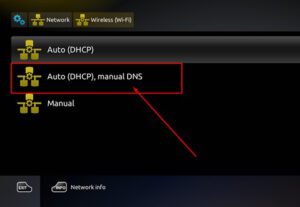
 Next, pick Network and press on "Auto (DHCP), manual DNS."
 Addresses in DNS:
Change DNS on a Samsung Smart TV
Step 1: On your remote, press the "Menu" button. First, go to the "Settings" menu and select "Network." Then, select "Network Status."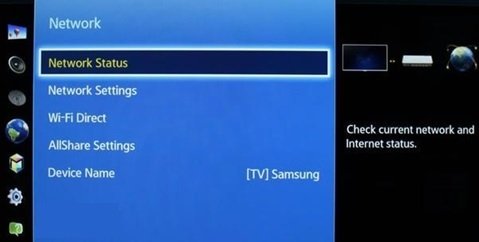
- Enter either 1.0.0.1 or 1.1.1.1 for Cloudflare DNS.
- Enter either 8.8.8.8 or 8.8.4.4 for Google DNS.
- Enter either 208.67.222.222 or 208.67.220.220 for Open DNS.
- Enter either 82.200.69.80 or 84.200.70.40 for DNS Watch.
How to make changes to a formula box's DNS
First, go to "Network Setting."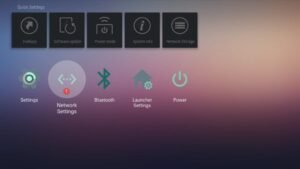
- Enter either 1.0.0.1 or 1.1.1.1 for Cloudflare DNS.
- Enter either 8.8.8.8 or 8.8.4.4 for Google DNS.
- Enter either 208.67.222.222 or 208.67.220.220 for Open DNS.
- Enter either 82.200.69.80 or 84.200.70.40 for DNS Watch.

How to make changes to your LG Smart TV's DNS
Step 1: Press the "Menu" button on your remote, then "Settings" and "All settings."
- Enter either 1.0.0.1 or 1.1.1.1 for Cloudflare DNS.
- Enter either 8.8.8.8 or 8.8.4.4 for Google DNS.
- Enter either 208.67.222.222 or 208.67.220.220 for Open DNS.
- Enter either 82.200.69.80 or 84.200.70.40 for DNS Watch.
How to make changes to your Sony Smart TV's DNS
Step 1: Press “Home” on your remote. Select Setup and press Network.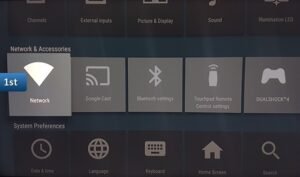


- Enter either 1.0.0.1 or 1.1.1.1 for Cloudflare DNS.
- Enter either 8.8.8.8 or 8.8.4.4 for Google DNS.
- Enter either 208.67.222.222 or 208.67.220.220 for Open DNS.
- Enter either 82.200.69.80 or 84.200.70.40 for DNS Watch.
How to change your Apple TV's DNS
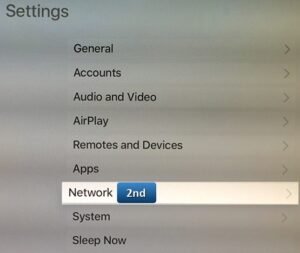
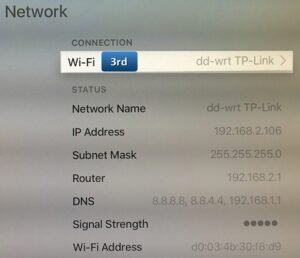
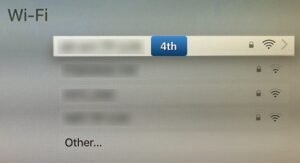
Step 1: On your Apple TV, press or click on the "Settings" menu and choose "Network."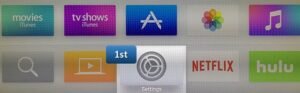
- Enter either 1.0.0.1 or 1.1.1.1 for Cloudflare DNS.
- Enter either 8.8.8.8 or 8.8.4.4 for Google DNS.
- Enter either 208.67.222.222 or 208.67.220.220 for Open DNS.
- Enter either 82.200.69.80 or 84.200.70.40 for DNS Watch.
How to make iPhone DNS changes
1. Navigate to “Settings”.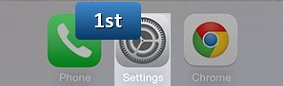

- Enter 1.0.0.1 or 1.1.1.1 for Cloudflare DNS.
- For Google DNS, enter 8.8.8.8 or 8.8.4.4.
- Enter 208.67.222.222 or 208.67.220.220 for Open DNS.
- Enter 82.200.69.80 or 84.200.70.40 for DNS Watch.
How to make iPad DNS changes
1. Go to the settings on your iPad. Now click on "Wi-Fi" and pick the network you're linked to.

- Enter either 1.0.0.1 or 1.1.1.1 for Cloudflare DNS.
- Enter either 8.8.8.8 or 8.8.4.4 for Google DNS.
- Enter either 208.67.222.222 or 208.67.220.220 for Open DNS.
- Enter either 82.200.69.80 or 84.200.70.40 for DNS Watch.
How to change your Android's DNS
1. Select “Settings”.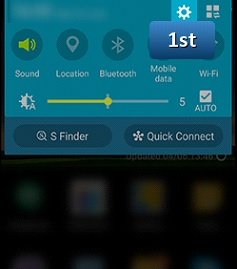

- Enter 1.0.0.1 or 1.1.1.1 for Cloudflare DNS.
- For Google DNS, enter 8.8.8.8 or 8.8.4.4.
- Enter 208.67.222.222 or 208.67.220.220 for Open DNS.
- Enter 82.200.69.80 or 84.200.70.40 for DNS Watch.
How to make changes to MAG's DNS
First, go to "Settings."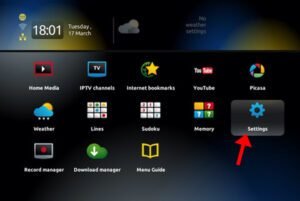
- Enter either 1.0.0.1 or 1.1.1.1 for Cloudflare DNS.
- Enter either 8.8.8.8 or 8.8.4.4 for Google DNS.
- Enter either 208.67.222.222 or 208.67.220.220 for Open DNS.
- Enter either 82.200.69.80 or 84.200.70.40 for DNS Watch.
⚡ Claim Your FusionClubTV Free Trial
No credit card required • Instant activation