


No credit card required • Instant activation
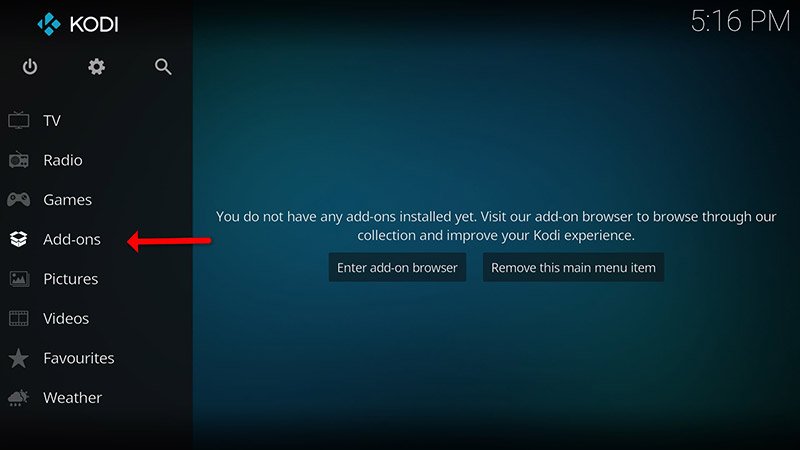
Step 2: When Kodi first loads up, it will appear quite blank. Devoid of add-ons and bereft of any display of videos stored within your hard drive, it necessitates the acquisition of supplementary components. What we require are some add-ons.
Click on “Add-ons“.
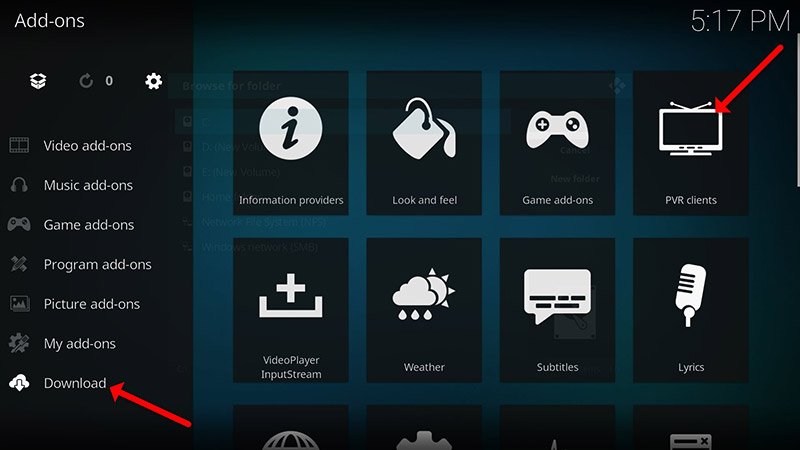
Step 3: Now click on “Download” then select “PVR clients“.
Note: The forthcoming procedure entails the download and installation of the PVR add-on. Once installed, there shall be no further necessity to navigate to the “Download” section.
Subsequently, you may locate the installed add-ons under the section labeled “My add-ons“.
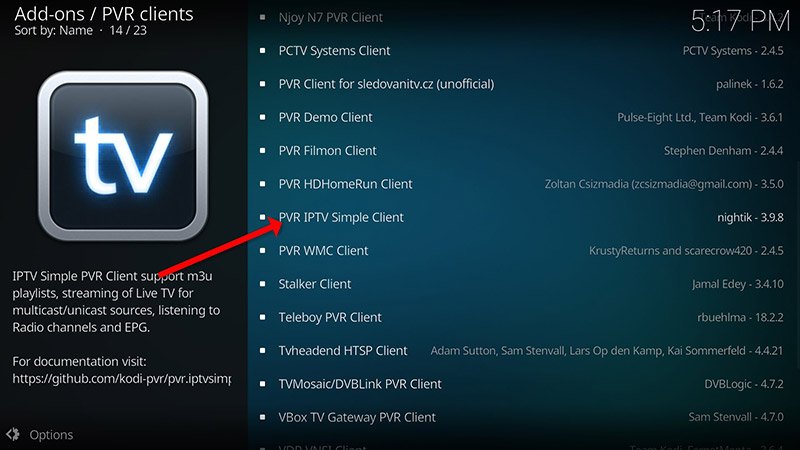
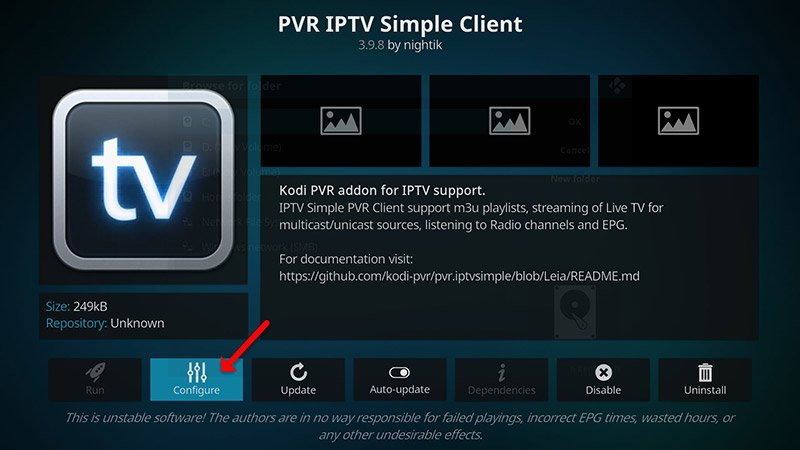
Step 4: Select “PVR IPTV Simple Client“.
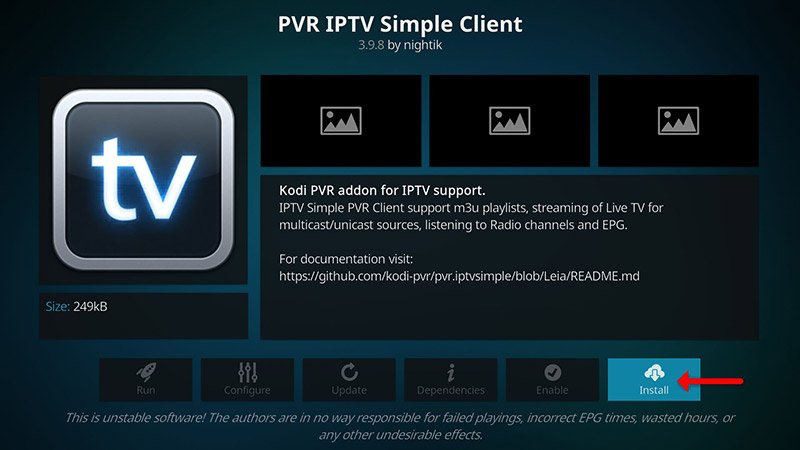
Step 5: Now click on “Install“.
Step 6: After installing “PVR IPTV Simple Client” head back to “My add-ons” then “PVR Clients” and run the add-on.
Now click on “Configure“
Step 7: Now select “M3U Play List URL“.
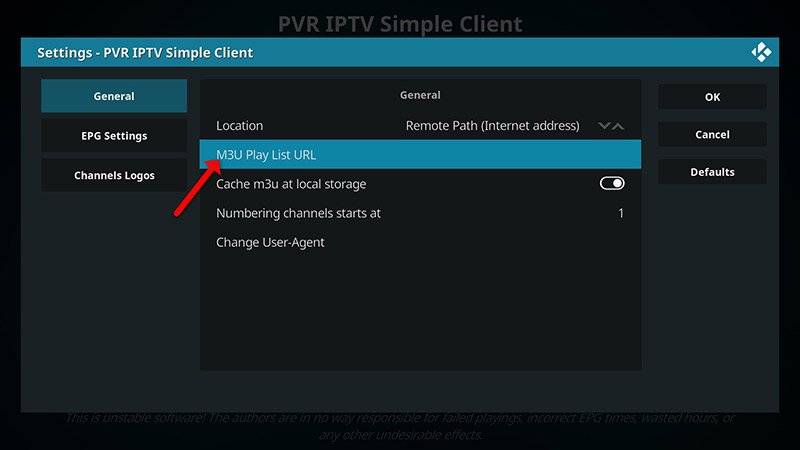
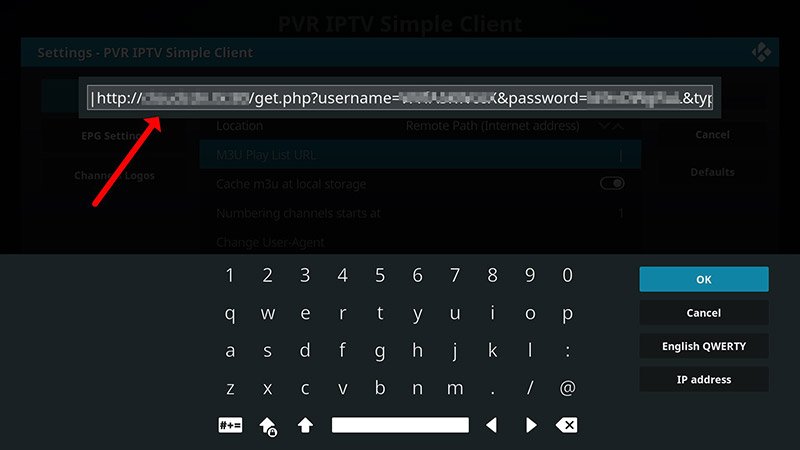
Step 8: Enter the M3U URL provided by your IPTV distributor and click “OK“.
Note: Progressive IPTV providers furnish a dashboard wherein you can generate your M3U URL.
How to add EPG
Step 9: Now go to “EPG Settings” and click on “XMLTV URL” for EPG. What is EPG?
You can get EPG url from your IPTV provider.
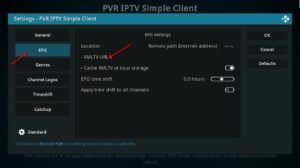
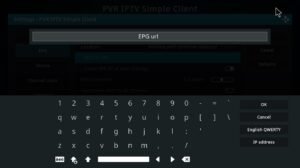
Step 10: Now paste your EPG URL and click “OK“.
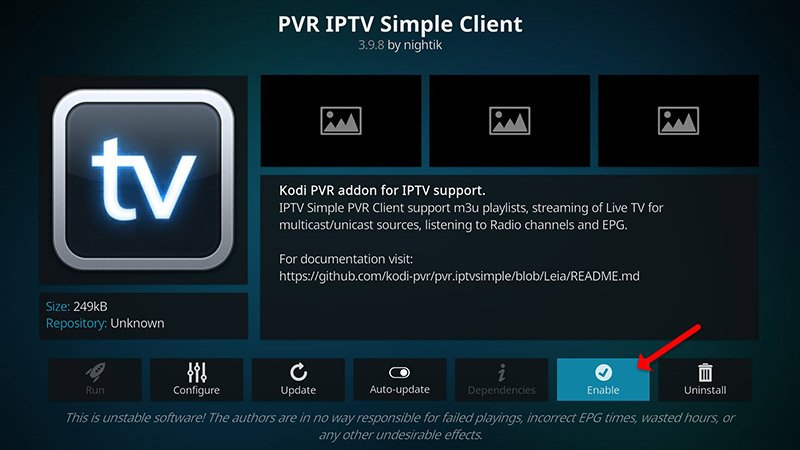
Step 11: Click on “Enable“.
Note: After enabling the add-on, you shall observe the option labeled “Disable“. This signifies that the add-on has been successfully enabled. Therefore, refrain from clicking on “Disable” again.
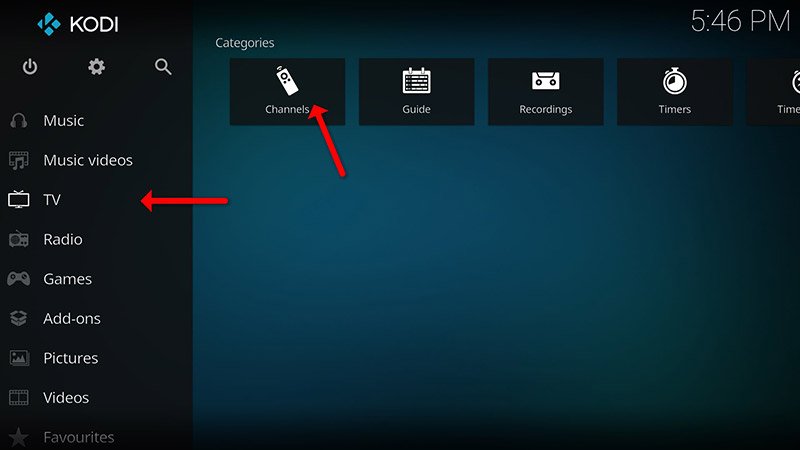
Step 12: Head back to “TV” and click on “Channels“.
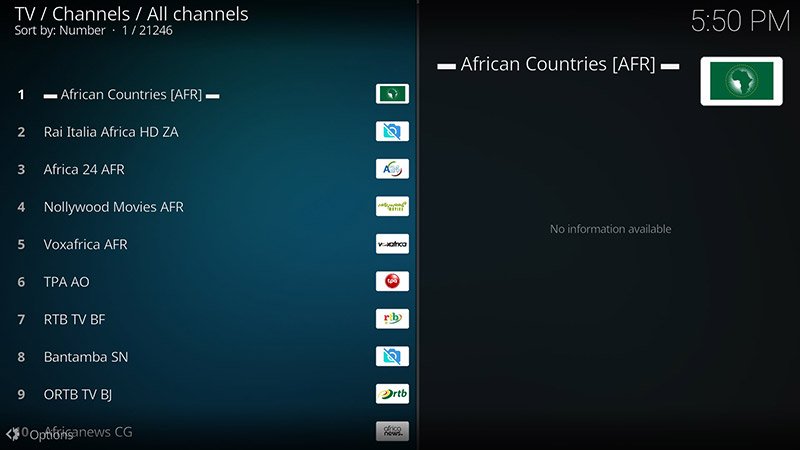
Step 13: Exercise patience until you receive the notification regarding the update of channels, signaling the completion of the installation process.
Congratulations! You have successfully acquired IPTV channels.
Please feel free to pose any questions in the comments section if you require additional assistance.
No credit card required • Instant activation